Espaniol
 Deutsch
 English


Optical Transceivers are hot-pluggable modules that provide optical connectivity by converting electrical input to optical light and, with the help of sensors, sending it through an optical cable. They plug into standardized module sockets of a networking device. A GBIC-SHOP Blueoptics© Optical transceiver is shown in figure 1:
There are many optical transceivers existing on the market from over 50 vendors. They come in various Form-Factors and with various connectors. However their installation is fairly similar.
For an installation of an optical transceiver we need a couple of tools which will mainly keep us safe and help us during the process of installation. It is very important to handle these modules with caution and care to guarantee maximum performance.
The tools needed for safe and easy installation of an optical transceiver are:
- An ESD preventive wrist strap which is a device that reduces or dampens the buildup of discharge of static electricity. This is very important because the discharge of static electricity could very easily damage the devices, specifically their electrical components and even ignite flammable gases. This ESD wrist strap is most commonly attached to a specific place already marked on the rack.
- An antistatic pad to set the optical transceiver on while working around the device.
- Cleaning tools and inspection elements for fiber optic equipment. These tools are essential when it comes to fiber optic networks. In many cases the contamination in the fiber component can cause loss of service, failure of the component itself and even failure of the whole system. Even dust particles that can only be seen under the microscope could potentially cause some kind of interference in the connection. A 1 micrometer dust particle situated on the cladding of a single-mode fiber can block up to 1.5% of the light and a 9 micrometer dust particle (still can’t be seen with the naked eye) can cause a total blindness of the fiber core, completely blocking it. Besides dust, other contaminating materials include oil which comes from our skin, film residues which are condensed from vapor and powdery contents.
Installing the Optical Transceiver is, arguably, the easiest part of the whole process of maintenance if the rules above are followed. Before installing the optical transceiver in the port it is worth mentioning that installing the transceiver with the optical cable attached to it may damage the cable, the connector of the transceiver or the device. That’s why disconnecting all cables prior to installing the transceiver is a must. Optical transceiver can come with different latches to secure them in the port.
- A Mylar Tab Latch
- An Actuator Button Latch
- A Ball Clasp Latch
The process of securing the transceiver in the port depends on the latch itself. Always read the transceiver’s manual to get familiarized with the type of latch and the process of securing it and releasing it.
- Attach the ESD preventive strap onto your wrist and onto the ESD ground connector most commonly found on the rack or a bare metal surface on the chassis
- Remove the optical transceiver out of its protective packaging. Do NOT remove the protecting dust cap (figure 2) on the optical transceiver until directed later in the installation
- Check the label on the optical transceiver to confirm the correct model needed
- Identify the send and receive labels on top of the receiver to confirm which side is top and which is bottom. These labels are in a shape of an arrow pointing towards and outwards of the receiver
- Hold the receiver in front of the port, with the correct side up, and insert it into the port. Do NOT use excessive force while inserting it as it may damage the receiver and the chassis of the device
- Secure the receiver in place using the latch. Pay attention to the type of the latch to confirm the transceiver is secured in the port. The transceiver is inserted in the port when a “click” type of sound is heard
- Make sure the transceiver is secured by gently pulling it without releasing the latch
- Inspect and clean the fiber optic cables and their connectors
- Only remove the dust protection when you are ready to connect the optical cables to the transceiver and save the plug for future use (figure 3)
- Immediately connect the fiber optic cable to the optical transceiver
- Observe the port status LED to make sure the transceiver is installed properly
Removing the transceiver from the port is basically the same procedure, backwards. Please keep in mind that installing and removing the transceiver too frequently could diminish its performance.
- Attach an ESD- protective strap on your wrist and ground the ESD ground connector on the rack or on a bare metal surface on the chassis
- Disconnect the fiber optic cable of the optical transceiver and immediately reinstall the dust plug. Before reinstalling the plug clean it thoroughly
- Release the transceiver’s latch
- Remove the transceiver by gently pulling it and immediately reinstall the dust plug and put the transceiver in an antistatic bag
Some useful tips and notes for installing optical transceivers and guaranteeing maximum performance:
- Do not remove the dust plugs beforehand
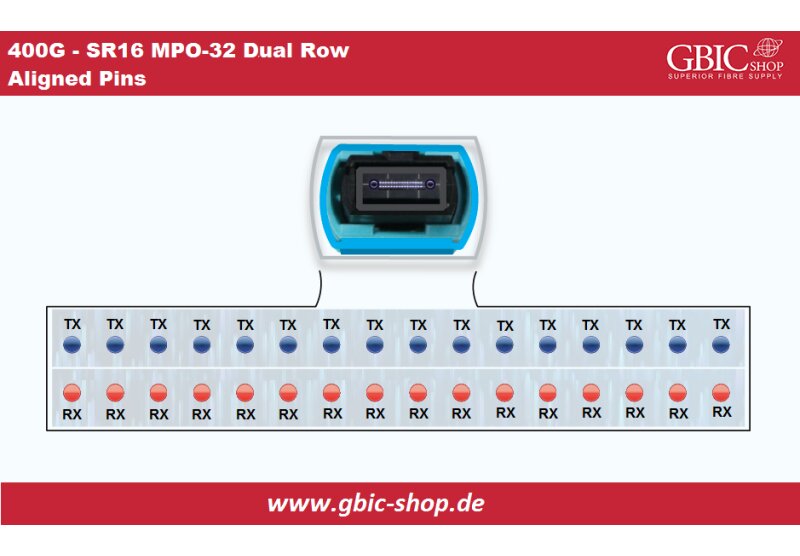
- On some transceivers transmit and receive marks can be replaced by TX (transmit) and RX (receive). This is most commonly the case with Cisco transceivers
- For transceivers with an actuator latch, the use of a bit of force onto the actuator button is necessary to ensure the transceiver is secured firmly
- For connecting the fiber optic cable always pay attention to the send and receive connectors. Mixing them will result in a failed installation
- Always make sure the correct form-factor, wavelength, type and compatibility characteristics are correct for the project the transceiver is needed for
Most CBO Blueoptics© transceivers are hot-swappable and they can be easily installed without powering off the system.
Common Mechanical Specifications: